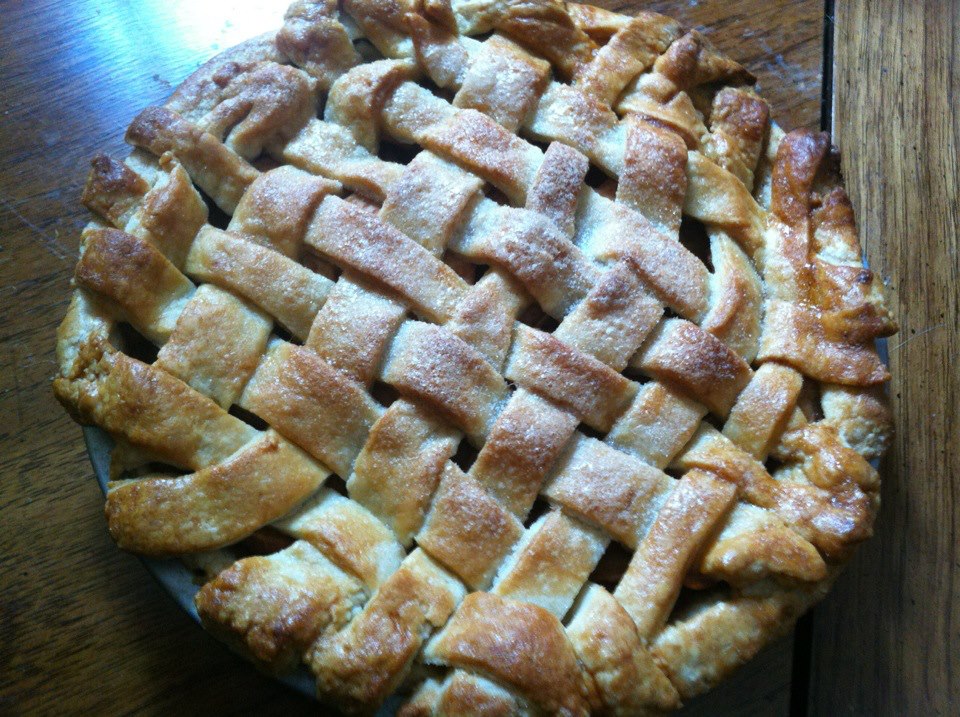
Tuesday, November 20, 2012

Classic Apple Pie


Two-Layer Apple Pie

3 cups all purpose flour
1 tsp salt
2 tbsp sugar
2 sticks + 1 tbsp butter, cut into small chunks
10 tbsp ice water
5 apples
1 1/4 cup sugar
5 tbsp corn starch
3 tbsp cinnamon
fresh ground nutmeg


Whisk the flour, salt, and sugar in a medium mixing bowl. Add the butter a bit at a time and mix with a pastry cutter until it looks like fine crumbs, with pieces no bigger than peas. Sprinkle the ice water over the crumbs and mix by pressing down with a rubber spatula. You can add an extra tablespoon or two of ice water if it won't come together.
Divide the dough in half. Form into 5" disks and wrap with plastic wrap. Refrigerate at least one hour.

After the dough has had time to chill, Preheat the oven to 375º. Take one piece of dough out and place between two sheets of parchment paper. With a rolling pin, roll it out to a 12" circle, then carefully roll it around the rolling pin. Hold the rolling pin just above the pan and carefully unroll the dough into place. Press down lightly to fit the dough into the pan, then cut excess off edges. Prick the bottom of the crust to reduce risk of bubbles when it bakes.

Cut up 5 apples, toss them in a sauce pot with about 1/2 cup of sugar and a few tablespoons of corn starch and a splash of water. Simmer and occasionally stir over medium/high heat until the apples are caramelized, let them cool a bit then throw them into the crust and do whatever fancy work you want with the top layer of crust.

Brush the top with a mix of egg whites & water, then sprinkle with sugar before baking.

Bake for 25-30 minutes or until lightly browned around the edges. Sometimes it takes 40.

Let cool mostly before serving.

Thursday, February 23, 2012

Zebra Cake with Raspberry Puree & Chocolate Ganache


Zebra Cake

3/4 cup butter at room temperature
1 2/3 cups sugar
3 large eggs at room temperature
2 2/3 cup all purpose or cake flour
1 1/2 tsp baking powder
1/4 tsp salt
1/2 cup whole milk
1/2 cup sour cream
2 tsp vanilla extract
4 tbsp cocoa powder

Preheat the oven to 350º. In a large bowl, beat butter until smooth, then beat in sugar until fluffy. Beat in the eggs one at a time, scraping the bowl in between. In a medium bowl, whisk together the dry ingredients and set aside. Stir the vanilla into the milk in a bowl, set aside. Mix 1/3 of dry ingredients into the butter mixture, then 1/3 of the vanilla milk, and repeat until all are combined. Pour half the batter into another bowl and add the cocoa powder.
Spoon 1 tablespoon of chocolate batter into the greased cake pan, followed by 1 tablespoon vanilla batter in the center. Rotate the pan after each addition to keep it evenly distributed.
Bake ...20, 35? minutes, remove from pan when partly cooled.

Chocolate Ganache
1/2 cup unsalted butter
1/2 cup semisweet chocolate

Melt in a double boiler over medium-high heat, stirring until smooth. Pour over cooled cake before adding raspberry layer.

Raspberry Topping
1 pack of raspberries
1/2 cup sugar
brandy or honey bourbon

Stir all together in a sauce pot over medium-high to high heat. Stir occasionally to prevent sticking. When it looks like jam, let it cool before piling into the center of the ganached cake and carefully spread it out to the edges.

Sunday, November 13, 2011

Kielbasa Kidney Bean Stew


1/2 an onion, diced
3 or 4 cloves of garlic, diced
1 tbsp butter
1 tbsp olive oil
3 or 4 cups of cubed potatoes (I used baby redskins, quartered)
1 kielbasa
2 15-oz cans kidney beans
2 8-oz cans tomato sauce
1 6-oz can tomato paste

Cook the kielbasa (whole) in a skillet, set aside to cool & cut into 1/4" rounds.
In your stock pot over medium/high heat, sautee the onions & garlic in butter and olive oil, with salt & pepper to taste. Add the potatoes, stirring occasionally until everything is nice and browned. Toss in 1/4 cup of water (or wine) to deglaze all the nice brown stuff from the bottom of the pan. Add the beans & stir hard enough to break some of them, this gives the stew better texture. Stir in the cut kielbasa, sautee some more. Add the tomato sauces and a few cups of water til it looks like soup, then let simmer until it thickens up a bit.

Serve hot with a dollop of sour cream, sourdough on the side is recommended!

Sunday, July 3, 2011

Plum & Strawberry Cobbler Cake


Yeah....It's been stupidly long since I updated. Life happens. Well, I made a hybrid of two of my favorite recipes from last summer, and here we go. It's great with coffee or tea. The cake is very dense, the cobbler is buttery and the plums are tart and light. I think it's a pretty nice balance.


Plum & Strawberry Cobbler Cake


For the Cake:


1 1/2 cups all purpose flour

1 tsp baking powder

¼ tsp salt

½ tsp cinnamon

1 cup unsalted butter @ room temperature

1 cup + 1 tbsp sugar

2 large eggs

1/3 cup milk

1 tsp vanilla


Preheat the oven to 400º.

Line the bottom of a springform pan with parchment paper and grease thoroughly with butter.


Whisk dry ingredients , set aside. Cream sugar & butter, Beat in the eggs one at a time, then half of flour, then the milk and vanilla, then the remaining flour. Pour into buttered pan. Set aside.


For the Fruit layer:


6-8 plums , sliced

¾ cup chopped strawberries

½ cup blueberries

1/3 cup sugar

1 ½ tbsp cornstarch

¾ tsp cinnamon

¼ tsp nutmeg


Whisk the sugar, cornstarch, and spices. Add the cut fruit and stir well. Pour onto the cake batter. Set aside.


For the Cobbler layer:


¾ cup all purpose flour

1/3 cup sugar

¾ tsp baking powder

1/3 tsp salt

¾ tsp cinnamon

6 tbsp butter, sliced and frozen

2 tbsp cold milk

½ tsp vanilla


In the bowl from the fruit, still all fruity, whisk the dry ingredients. Cut in the butter until the size of peas, then barely stir in the milk & vanilla. Drop in crumbles on the fruit layer.

Place in the center of the oven and bake for 45-60 minutes or until golden brown and doesn’t wiggle when moved.

Let cool completely before removing from springform pan. Keep refrigerated.

Saturday, December 11, 2010

Honey Bourbon Nut Pie

My super awesome uncle Greg came to New York for a couple of days recently. He's never seen me in my natural habitat before, so needless to say I was very excited and wanted to make something special for his visit. He and my also super awesome aunt Sharon are both serious nut fiends, so I decided on a nutty tart of some kind. I got the idea for this pie from this tart, but I used a lot more nuts & put the orange into the caramel itself, and added
molasses and bourbon to the mix.
Unfortunately I had loaned a friend my tart pan -- though, it turns out, she had returned it and I just couldn't find it. Oh well, it was a happy mistake, becuse I like the pie version! Nice and thick, and after it's been in the fridge you can eat a slice of this sucker with your hand. When hot it's pretty deliciously gooey.

Pies & tarts are tricky, and I have gone out of my way to get a lot of practice making them lately. Ice water & cutting in cold butter is part of the key, I feel, and if you cut it into cubes or thin slices it is much easier to get the consistency right. The coldness matters! Keep your fingers out of it as much as you can.


Buttery Pie Crust
2 1/2 cups all purpose flour
2 TBSP sugar
3/4 tsp kosher salt
1 cup (2 sticks) butter, cold & cut
8+ TBSP ice water

This recipe yields 2 pie shells, or one pie w/ lattice top.
In a medium/large bowl, whisk the dry ingredients. Toss in the cold butter cubes and cut them in with a pastry cutter or hand mixer until it looks like coarse crumbs. Sprinkle the ice water in and mix until dough forms. Shape the dough into two discs about 5" around, wrap in plastic & refrigerate or freeze for at least 1 hour.

Remove 1 dough disc from the cold. Set a piece of wax paper on top of a thin plastic cutting board, lightly dust it with flour, and set the dough on the flour. add another dash of flour, another sheet of wax paper, and roll out to a roughly 11" circle. Peel up the wax paper & dust more flour occasionally, and flip the dough so you can be sure it's not sticking to the paper. When
the dough is ready to go, remove the top layer of wax paper, set the pie pan face down on top, and flip the cutting board over. It never fails me!
Gently press the dough into place & shape the edges. Freeze for 20 minutes before filling & baking.


Honey Bourbon Nut Pie
1 cup heavy cream
3/4 cup sugar
1/4 cup honey
2 tbsp molasses
zest of 1 orange
2 tsp orange juice
1/3 cup honey bourbon
2 1/4-2 1/2 cups total, mix of: almonds, cashews, walnuts, pecans, macadamias, hazelnuts, etc. salted or not.

Preheat the oven to 350º.
Bring the cream, sugar, honey, & molasses to a boil in a sauce pan, stirring well to dissolve the sugar. (I recommend getting a heatproof rubber spatula if you don't already have one, it is very handy!) Keep stirring until the mixture thickens a little, add the orange zest, juice, bourbon & stir a little longer. Remove from heat, stir in the nuts, and pour into the pie crust. Bake for 30 minutes or until the crust is golden brown. Let cool partially before serving, and add some whipped cream - or better yet, butter pecan ice cream. You can never have too many nuts.

Sunday, September 26, 2010

Strawberry Vanilla Cake


I have been making a ton of birthday cakes lately, but I haven't been getting good photos of many of them. This cake is leftover batter from a batch of cupcakes for my friend Jin's going away party - she's moving to Korea in a couple of days, for a couple of years. This recipe makes roughly 30 cupcakes (maybe more) or 24 cupcakes plus a single round cake pan (my habit's to use a 7" wedding cake pan so it's a tall deep tiny layer cake).

Leave out the strawberries and this is just a really good (like, REALLY good) vanilla cake which is sturdy enough for layers or for cupcakes with fillings. It's my standard vanilla cake now, adding extra egg yolks & a little food coloring for yellow cake. I bet it'll make great chocolate cake, too. I'll get back to you on that.


Vanilla Cake w/ Strawberries


Strawberry Compote
2 pints fresh strawberries, cut in large chunks
1/3 cup sugar
2 tbsp cornstarch
1/4 cup water

Simmer strawberries & sugar in a small sauce pot over medium-high heat, stirring occasionally. Dissolve the cornstarch in water and whisk into strawberry pot once the berries are half dissolved. Keep on the stove stirring often until thickened to desired state. Let cool.

Vanilla Cake
1 cup (2 sticks) butter at room temperature
2 cups sugar
4 eggs + 2 egg yolks
3 cups flour
1 tbsp baking powder
3/4 tsp salt
1-2 tbsp vanilla
1/2 cup whole milk
1/2 cup sour cream

Preheat the oven to 350º. Line cupcake pans with paper & spray with nonstick spray or generously grease two 9" round cake pans.
In a small mixing bowl, whisk the vanilla, milk, and sour cream. Set aside.
In a medium bowl, whisk the flour, baking powder, and salt. Also set aside.
In a large bowl, cream the butter with a hand mixer for several minutes until fluffy. Add sugar, cream 7 minutes until. Add eggs one at a time, beating and scraping down the bowl after each. Alternately add the flour mixture and the milk mixture, 1/3 at a time, beating well after each addition. Add the strawberry compote and barely stir in.
Pour by heaping tablespooonfuls into cupcake cups - only up to 2/3 full - or pour evenly and smooth out in 2 round cake pans. Bake around 25 minutes or until a toothpick inserted in the center comes out clean.
Let cool completely before icing with this:


Amanda's Best Vanilla Icing


3/4 cup (1 1/2 sticks) unsalted butter, slightly softened
3 1/2 to 4 cups powdered sugar
1/2 cup sour cream
1 1/2 tablespoons vanilla
4 tablespoons heavy cream

Cream the butter with a hand mixer on medium-high until fluffy in a medium-sized mixing bowl. Add half the powdered sugar. Beat to death with the mixer, then add the vanilla, sour cream, and heavy cream. Beat to death some more, add the remaining powdered sugar, and refrigerate for 30 minutes or so before piping onto cupcakes. For layer cake it's ok to use at room temperature for the assembly, but refrigerate before decorating. I strongly recommend using fresh strawberries (sliced) on top and between layers!

Thursday, May 20, 2010

Vegan Mushroom Spring Rolls


That's right, I said vegan! I do cook healthy things, too, yaknow. I have to admit, though, that vegan dishes have been a rarity for me, and the night I made these was the first time I made an all-vegan meal. Last Thanksgiving (remember the Buttermilk Cake with Brandied Cranberries?) I had a handful of vegan dishes, but not the whole meal, by far.

I made these in honor of my friend Melissa's annual birthday-weekend visit to New York. She's a vegan chef in Chicago, and is one of the two people who convinced me vegan food can actually taste good and not be processed nastiness and doesn't, in fact, have to consist almost entirely of soy products. So, of course, I invited Haley, the other of the aforementioned two, to join us for dinner.

Spring rolls are not terribly hard to make, if you can wrap a burrito you can do this. There's a lot of chopping and shredding and sauteeing to be done, and it takes a little practice to get the rice wrappers to behave how you want them to, but after you've made the first few you'll get the hang of it and they'll be done before you know it.


Vegan Mushroom Spring Rolls

1 red onion, diced
1 tablespoon minced ginger
1 1/2 cups sliced or chopped mushrooms, shiitake or baby bellas or oysters.
1 cup white cabbage, shredded or finely chopped
1 cup carrots, shredded
1 teaspoon white pepper
1 teaspoon sesame oil
1/4 cup chopped cilantro
1 package rice paper wraps (spring roll wraps)

Salt to taste
Canola oil for frying

In a wok or large skillet, add a little oil and sauté onions and ginger. Add the mushrooms and stir. Add the cabbage, carrots and chives. Season. When mixture is soft, place in colander to drain. Add the sesame oil and cilantro when mixture is cooled.

Pour boiling water into a wide pasta bowl. When it's cool enough to put your hands in, carefully dip one rice wrap at a time into the water just long enough to make it soft. Lay a heaping tablespoonful of filling in a line on the center of the softened wrap. Fold one long side over, fold both the short sides in, then roll toward the remaining edge. Set aside and repeat until all are made before frying. Start heating the oil about halfway through.

When the oil is hot, place a few rolls in it spaced apart. They should get opaque and brown gradually. (If they seem to be soaking up the oil, it is too cool. If they are getting dark brown it is too hot. But you probably know all about frying stuff, right? Right.) Set aside on paper towels to drain as you fry the rest.

Serve with dipping sauce. I generally just put bits of the following in a tiny bowl until it's a nice rich color:
soy sauce
rice wine vinegar
garlic
scallions, chopped

Tuesday, May 18, 2010

Chicken Fingers


Normally I make this recipe in the form of popcorn chicken, but somehow that doesn't ever seem to photograph well, so I've been unable to post the recipe here. Luckily for you my roommate has a super crazy better-than-mine camera and now everything seems to photograph well! Phew!
I have been playing with variations of this recipe for years, and once upon a time a friend of mine made me fly from Brooklyn to the Midwest for her birthday party and make a big batch of this despite her boyfriend being a chef. Ohh snap. And So Began my smugness about my kitchen skills. But, I gotta give credit where credit is due, my darling roomie Catherine showed me what's what when it comes to technique - there was something about the way I was making this that worked beautifully sometimes and not so well others, and she pointed out the key. Lucky you! You can use vegetable, canola, corn, or peanut oil for frying. I use a mix of vegetable and peanut oils, but we're fancy at my house, and you don't have to be. Plain old vegetable oil works just fine.
If you want to make the honey mustard we poured over the chicken fingers in this photo, stir together in a bowl: honey, dijon mustard. Yes it's that easy.

Chicken Fingers or Popcorn Chicken

2-3 lbs boneless chicken
1 cup cup all purpose flour
3 eggs
1/2 cup of milk
1/4 tsp garlic powder
1/4 tsp chili powder
1/2 tsp adobo
1/2 tsp paprika
oil for frying

Put about a cup of flour into a wide shallow dish and set aside.
Preheat the oil in a deep skillet or frying pan, or even a wok.
Whisk the eggs, milk, and spices with about 1/4 cup of the flour. Cut the chicken into pieces the size you prefer (small for popcorn chicken, strips for fingers). Dip chicken pieces one at a time in the egg mixture then place into the flour. Set the floured chicken aside on a wire rack or paper towels, whatever you've got, and let them rest a minute while you prepare another round. 
A handful at a time, give the chicken a second round through the egg mixture and the flour, then straight into the oil. Fry until golden brown and drain on paper towels.
To keep early batches warm, I recommend putting those paper towels on a cookie sheet, maybe with a wire rack under the towels, in the oven on low heat.

Saturday, May 15, 2010

Chicken & Black Bean Tacos


So I'm on a Mexican kick. Sue me. I get a thrill (or at least a full stomach) out of making standards with my own twist, as I think we all know by now. This is just another example, and it's definitely worth trying. Really quick and easy and healthy, too! Well, depending on how much cheese and sour cream you put on them...

Chicken and Black Bean Tacos

flour or corn tortillas, small is better.
2 chicken breasts
1/2 cup mojo sauce/marinade*
1 can of black beans, drained
baby spinach
sour cream
panela (crumbly white Mexican cheese)

Marinate the chicken breasts in mojo overnight, I use a giant ziploc and toss it in the fridge. It's still good if you only marinate for an hour or two, but way better if you give them a day.
If you have a grill, or an iron grill-pan for your stove, that's best. If not, you can cook the chicken in a skillet, just give it 10 minutes or so on each side. While the chicken is cooking, throw the beans and some fresh black pepper in a sauce pot with a smidge of butter or olive oil over medium heat. Stir from time to time and add water or more oil if the beans start to stick.

In a shallow frying pan over low/medium heat, warm the tortillas enough that they can fold without breaking, one at a time. set the already warmed ones under an ever-so-slightly-damp cloth to keep them warm and flexible.

Cut the chicken into thin strips. If it looks a little too pink in the middle for your comfort, as often happens with grilling, throw them into the frying pan for a minute with a bit of marinade til they're definitely thoroughly cooked.

Place some spinach leaves in the center of each tortilla, place beans and chicken on top, garnish with sour cream and panela and a little hot sauce if you're so inclined.

See? Easy!


*Mojo can be bought in the Mexican and/or condiment aisle at most grocery stores, but here's a quick list of the contents if you want to do it yourself and keep some handy in a jar in your fridge - just throw it all in the blender. Boom. You're done:

  • 6 cloves garlic, coarsely chopped
  • 1/2 cup minced yellow onion
  • 1 cup freshly squeezed orange juice
  • 1/2 cup freshly squeezed lime juice
  • 1/2 teaspoon ground cumin
  • 1 teaspoon chopped oregano
  • 1/2 teaspoon lemon-pepper seasoning
  • 1/2 teaspoon freshly ground black pepper
  • 1 teaspoon kosher salt
  • 1/4 cup chopped cilantro
  • 1/2 cup olive oil

Thursday, May 13, 2010

Tuna & Cheese Quesadilla with Pico de Gallo


Sorry, folks, I've been a busy bee the past couple of ...months. One of you was kind enough to send me a nudge asking for more recipes, and I couldn't help but comply. The good news is I have moved out of the hood and into a swank new apartment near a glorious park with a wonderful new roommate who cooks as much as I do, and let me tell you, it's great to have a fellow foodie in the house! Oh the bouncing of ideas that goes on in here!

And so, I bring you another variation on one of my favorites, the tuna melt. This is what I came up with for dinner tonight after a nice little raid through the pantry and the fridge. Yes, there happened to be pico de gallo hanging out in the fridge, which my roomie made the other day. Her recipe consists of "some tomatoes, some onion, some cilantro, and lime juice." There you have it.

Tuna & Cheese Quesadilla
1 can of tuna, drained
2 tsp mayonnaise
1/3 cup cheddar, finely shredded (add some jack if you want)
1/4 cup panela
salt & pepper to taste
2 tsp butter, in 2 pieces
2 corn or flour tortillas

In a small bowl, stir the tuna, mayo, and cheeses. Melt half the butter in a smallish frying pan or skillet over low heat. As soon as it is liquefied, place one of the tortillas in the butter and spread the tuna mixture on the tortilla. Place the other tortilla on top. When the cheese looks melty, carefully lift the quesadilla out of the pan and toss in the other half of the butter and set the quesadilla back in it as soon as the butter is melted.
Turn the heat up closer to medium and cook until the cheese is completely melted and the tortilla is crispy and slightly browned. Top with sour cream and pico de gallo.


Saturday, January 30, 2010

Sausage & Egg Biscuit Sliders


We all love sliders. I mean, how can you not love a miniature burger? Honestly, I made them small because the only breakfast sausage patties at my closest grocery store are small, but I am really keen on the idea of making them small from now on. What an adorable breakfast!

I actually have another, slightly larger batch of these biscuits in the oven as I type this, while my boyfriend makes some thick-cut bacon to go with them. We love breakfast food around here, even (especially!) around mid-afternoon on weekends.

There are 2 keys to making these biscuits turn out beautifully.
1) I'm serious about the butter & milk being very cold.
2) Do not overmix, follow the kneading directions. It's worth it, and it's not difficult.

Best Flaky Biscuits
makes 10-12 depending on size.

2 cups all purpose flour
2 teaspoons baking powder
1/4 teaspoon baking soda
1 teaspoon salt
8 tablespoons butter (7 for dough, 1 for brushing on top)
3/4 cup very cold milk + 2 tbsp for brushing on top

Preheat the oven to 425º.
Slice off 1 tbsp of butter and set aside. Cut the remaining butter into thin slices and place in the freezer for a few minutes.
In a medium/large bowl, whisk together the flour, paking powder, baking soda, and salt. Add the frozen thin butter and cut it in with a pastry cutter. When the mixture looks like lumpy crumbs, pour the milk in and stir with the pastry cutter until it just barely forms a dough. Dump out onto a clean surface and press into a solid rectangle. Fold it in thirds (like a letter), press out to the original rectangle's size, and repeat 3 or 4 times until the dough is fairly smooth. Roll or press out to about 1/2" thick and cut with cutters. Brush the tops with a mixture of milk & melted butter before placing in the oven for about 10 minutes or until lightly browned on top.

Now to make them into breakfast sliders!

While the biscuits are in the oven, cook some sausage patties (I used 8). Crack 4 eggs into a bowl and lightly beat them with salt & fresh ground black pepper. Cook them in a skillet omelet style with some butter. Cut out egg rounds with the same cutter you used for the biscuits.

Assemble the sandwiches as soon as everything's cool enough to touch.

Thursday, January 28, 2010

Chicken Flautas


I live in a predominantly latin neighborhood. I don't specify what kind of latin because it's a mix, which means I am surrounded by pretty amazing (and cheap) food. My first apartment in this neighborhood was wonderfully placed, a block away from the best cheap taqueria in the neighborhood (in my opinion, anyway). It was there that I got hooked, obsessively, permanently, on chicken flautas.

Flautas, in case you are not familiar with them, are basically pre-cooked meat (pork, beef, chicken, whatever), seasoned and wrapped in a flour tortilla then deep fried. Of course, it's not required that you eat them with beans and Spanish rice and guacamole, and the plantains are just there because I love them. But it's really not a bad idea.

Chicken Flautas
serves 2 to 4 people, depending on how many side dishes you make.

2 boneless chicken breasts
1 teaspoon adobo
1 teaspoon Sazón
1/2 tsp onion powder
6 to 8 small flour tortillas

Cut the chicken into long thin strips, about 1/2" wide. Heat a skillet with about 1/4 cup of water in it, then place the chicken in it, dust with seasonings and cook until the chicken is solid white. Remove from heat. Dump any excess water.
Pour about 1 1/2" of vegetable oil in the skillet and heat over medium-high. Wrap a few strips of chicken tightly in a tortilla, place it in the hot oil carefully, repeat with the rest of the chicken. Cook them until the tortillas are golden brown and crispy. Drain on paper towels before topping with sour cream, salsa, crumbled queso fresco, hot sauce, whatever.

Monday, January 25, 2010

Chocolate & Vanilla Spiral Cookies


Every December I put together a pile of favorite cookie recipes and make 6 or 7 kinds, arrange them into assortments and mail them off to friends and family who don't live nearby. This year I took a road trip with my boyfriend and delivered them by hand, for the most part. These didn't make it into this year's round because I couldn't find the recipe anywhere, that is, my copy of it got wet on my kitchen counter and there was really no telling how much of the first 5 ingredients it called for. Fortunately, when I made the xmas cookie extravaganza a couple of years ago, one of my friends fell in love with these cookies and I gave her a copy of the recipe, which she just happened to locate last week. Many thanks, Shannon, for scanning it for me! Reunited and it feels so goood......Eh, I'll save it for karaoke night. I'm just happy to have these babies back in the recipe box.

The best thing about these, if you ask me, is that they require refrigeration. Usually that annoys me about cookie doughs, but in this case the dough has to be rolled into a log anyway, so it's like making your own slice-and-bake dough way better than the premade grocery store garbage and if you forget about the dough for a few weeks, SURPRISE, instant cookie dough! Do yourself a favor and make a double batch, and leave one log of dough in the fridge or freezer for a later date. Oh, and sometimes I press the dough-log's sides in so the cookies are square. It's just one more way I entertain myself for almost no money. (They only stay square if the dough is still very cold when they go into the oven.)

Another note, please please don't try to make these without parchment paper.

Chocolate & Vanilla Spiral Cookies

2 cups all purpose flour
1/2 tsp baking powder
1/4 tsp salt
1 cup (2 sticks) unsalted butter @ room temperature
1 cup sugar
1 tablespoon light brown sugar
1 large egg
1 1/2 tsp vanilla
3 1-oz squares baking chocolate (or 9 tbsp cocoa powder)

If you are using baking chocolate, start with melting it in a small saucepan or double boiler and set it aside to cool.
In a small bowl, whisk together the flour, baking soda, and salt. Set aside.
In a medium bowl, cream the butter, sugar, and brown sugar with an electric mixer at medium speed until light and fluffy, about 3 minutes. Scrape the bowl with a rubber spatula, add the egg & vanilla. Beat at medium speed until just combined, then mix in the dry ingredients.
Separate the dough into two bowls. Stir the melted chocolate or cocoa powder to one bowl, leaving the other alone.

Roll out the vanilla dough between two sheets of parchment paper to a 12'x16" rectangle roughly 1/4" thick. It doesnt have to be precise. Repeat with the chocolate dough, on separate paper. Throw them both in the freezer for ten minutes, then remove the paper from one side of each. Carefully lay the exposed side of the chocolate face down on the exposed side of the vanilla, then peel off the top layer of parchment. Working from a short side, roll the dough from one edge to the other to create the spiral, using the parchment paper underneath to help you as much as possible. Wrap the parchment around the finished dough log and put in the fridge or freezer until nice and cold and solid.

Preheat the oven to 375º. Slice the cookie dough 1/4" thick and place 2" apart on cookie sheets. Bake 12-18 minutes or until the vanilla parts are golden at the edges. These cookies will be very soft for a few days, then they're about the texture of storebought cookies - that is, if you are shipping them, wait a few days or they will crumble in the mail.

Sunday, January 24, 2010

Banana Pancakes


What, more pancakes? Look, if you have people over for brunch as often as I do, you have to have more than one pancake trick up your sleeve. This is my basic pancake recipe (the sour cream ones I posted last week are my basic recipe now) with an over-ripe-spotty-but-not-solid-black-yet banana thinly sliced and added to the uncooked side just before flipping them over. If you have a little butter in the pan, the bananas caramelize ever so slightly and get sweetly fragrant. Way better than just slicing some bananas on top of the pancakes after they're finished.

I learned this method of banana pancake making from one of my former roommates, Yves, who also happens to be the person who schooled me on plantain frying. Go figure. I wonder if I still have a photo of her huevos rancheros... they were to die for!

Banana Pancakes
serves 2-3 people, makes roughly six 8" pancakes.

1 1/4 cups all purpose flour
1/2 tsp salt
1 tbsp baking powder
1 tbsp sugar
1 egg, beaten
1 cup milk
1/2 cup sour cream
2 tbsp melted butter
1 or 2 overripe bananas thinly sliced

In a medium bowl, whisk the dry ingredients. Set aside.
In a small bowl, whisk together the egg, milk, sour cream, and melted butter. Stir gently into the dry ingredients, leaving the batter a little lumpy. Add more milk if needed to make the batter pourable.
Use a 1/3 cup or 1/2 cup measuring cup to pour batter onto a hot, lightly buttered griddle. When the large bubbles start to show up, lay a few slices of banana on the batter before flipping the pancakes over. If you put the bananas down too soon the batter underneath never cooks.

Friday, January 22, 2010

Grilled BBQ Chicken & Pan-Fried Sweet Potato Thick Chips


Those of you who have been reading this blog for a while (or are actually my friends in real life and have been here for dinner) know that I am more than a little obsessed with sweet potatoes. Not a week goes by that I don't include them in my dinner, and I am always trying to think up new ways to prepare them.

When I was a kid, my grandma used to occasionally cut potatoes about 1/4" thick and pan-fry them in a little vegetable oil. They'd get nice and brown and crispy around the edges and soft inside, like fries, only flatter. I have attempted to make an oven-baked version of those thin-cut potatoes (and sweet potatoes) and, well, it wasn't pretty. Tasty, but not pretty. I'll spare you those recipes, because they usually ended up being served as mashed potatoes (ha!) anyway.

This barbecue sauce recipe is just a basic idea, of course one can't always measure when throwing in a dash of this and a few shakes of that, but if you use this as a guideline you can adjust however you like and it'll still be barbecue sauce. If you don't like the idea of using ketchup, feel free to use plain tomato sauce and throw in some extra vinegar.
I like my bbq sauce dark and thick and sweet and a little spicy, specifically, I like it to taste like the so-called 'sweet' sauce at a Floridian BBQ chain called Sonny's - deep down we all love what we grew up with, right?

It's worth noting that this meal only cost like $5.ºº to make and we were stuffed.

Grilled BBQ Chicken

BBQ Sauce:
2 tbsp apple cider vinegar
2 tbsp brown sugar
1/4 cup lemon juice
1 1/4 cup ketchup
1/3 cup Worcestershire sauce
1/2 tbsp mustard powder (or prepared mustard)
3/4 tsp freshly ground black pepper
2 tbsp molasses
1/2 tsp paprika
1 tsp garlic powder
pinch of allspice
2 chicken breasts with fat removed

Whisk together all ingredients (except the chicken, obviously) in a bowl or jar. Adjust seasonings as desired.

Pour half of the sauce into a medium bowl or wide shallow dish. Cover the chicken in sauce and let marinate for at least 30 minutes. Reserve the other half of the sauce for dipping or pouring later. Be sure not to let it come into contact with any raw chicken.

Heat a cast iron stovetop grill over medium-high heat and lightly oil. Place the chicken on it when a drop of water sprinkled on the grill sizzles like crazy. Flip the chicken with tongs after 8-10 minutes, and cook the other side another 8-10 minutes. Check for doneness before serving.

Pan-Fried Sweet Potato Chips

1 gigantic sweet potato
2-4 tbsp vegetable or peanut oil
1 tsp kosher or table salt

Peel the sweet potatoes and slice them about 1/8"-1/4" thick. (1/8" makes crunchy chips, 1/4" give you soft centers with crispy edges).
Heat a skillet over medium-high heat and add the oil. Place a layer of potatoes on the bottom, not overlapping. When they start to turn dark brown, flip them. Drain on paper towels while you cook the remaining batches, adding a tiny bit of oil if needed. As the last batch finishes, put all of them back in the pan to get hot again. Remove them onto paper towels and sprinkle generously with salt. It always takes more salt than I expect to get sweet potatoes nice and salty.